As an Amazon Associate I earn from qualifying purchases. This post contains affiliate links. If you buy through them we may earn a commission at no extra cost to you.
Product prices and availability are accurate as of the date and time indicated and are subject to change. Any price and availability information displayed on Amazon at the time of purchase will apply to the purchase of this product. Certain content that appears on this site comes from Amazon. This content is provided "as is" and is subject to change or removal at any time.
Changing the gear oil in an outboard’s lower unit takes two screws and maybe half an hour, most of it spent waiting for the old oil to drain. The oil itself is barely the point, though. What drains out of that gearcase is one of the best early warnings you’ll get that water is getting in, and water in a gearcase is how a cheap seal turns into a cracked housing.
So here’s how I do the job on my own motor, plus how to read what comes out, which is the part most write-ups skip. It’s one of the seasonal jobs in the maintenance schedule I keep, and I do it every fall before winterizing the motor. Your manual has the exact gear lube and amount for your motor, and it wins over anything here.
Why this job matters more than its half hour
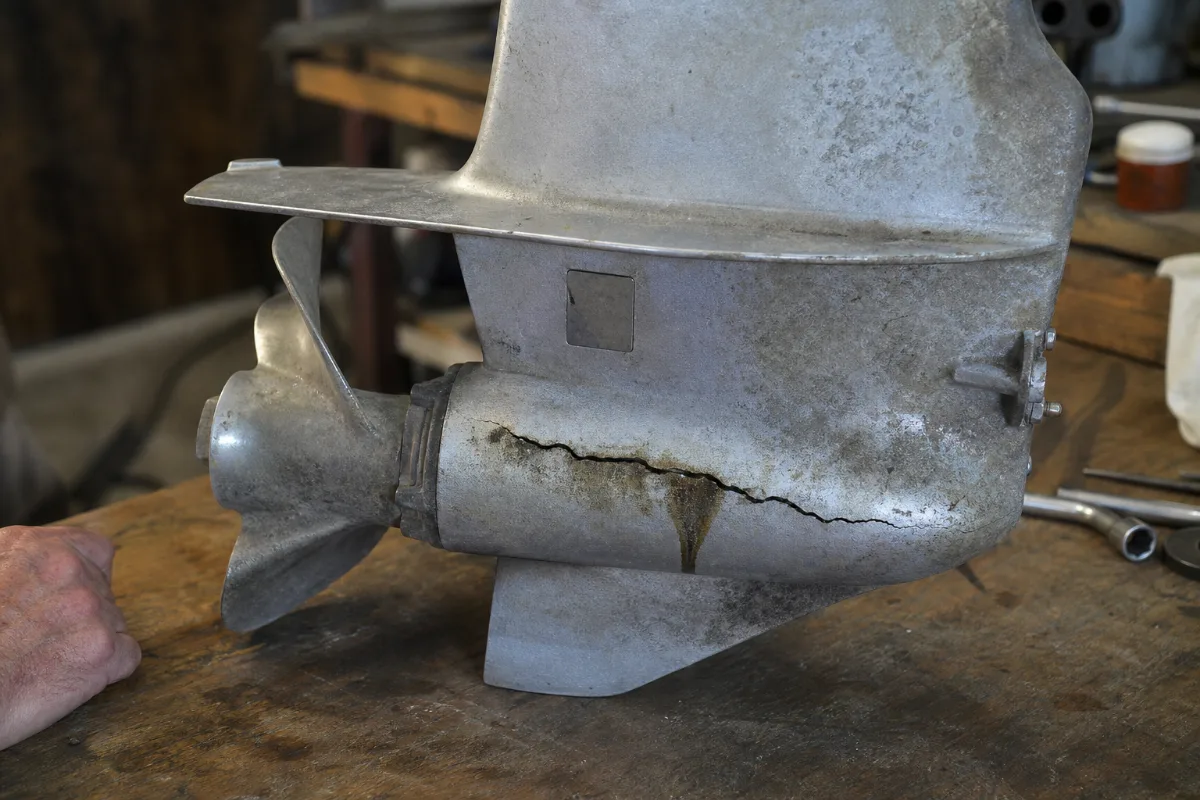
The lower unit is the part of the motor that lives underwater. Inside it, the gears that turn the prop run in a bath of gear oil, sealed in by rubber seals around the shafts. Seals get old. Fishing line wraps around the prop shaft and chews at the seal behind the prop. And once a seal lets water in, that water tends to settle toward the bottom of the case.
Two things can happen next. The gears and bearings run in watered-down oil and wear faster. Or winter shows up, the water freezes, and the housing cracks. I’ve already told the story of the gearcase that cracked on my first boat, the one that cost me a season, so I’ll spare you the details. The short version is that a seal job would have cost a fraction of what the fix did.
Most manuals put this job at every 100 hours or once a year, whichever comes first, and a lot of them want an early change on a brand-new motor too. I do mine every fall no matter how little the motor ran, because on a weekend motor the calendar always comes first. (Crankcase oil on a four-stroke is a separate job with its own schedule, so don’t mix the two up.)
What you need, and what to skip
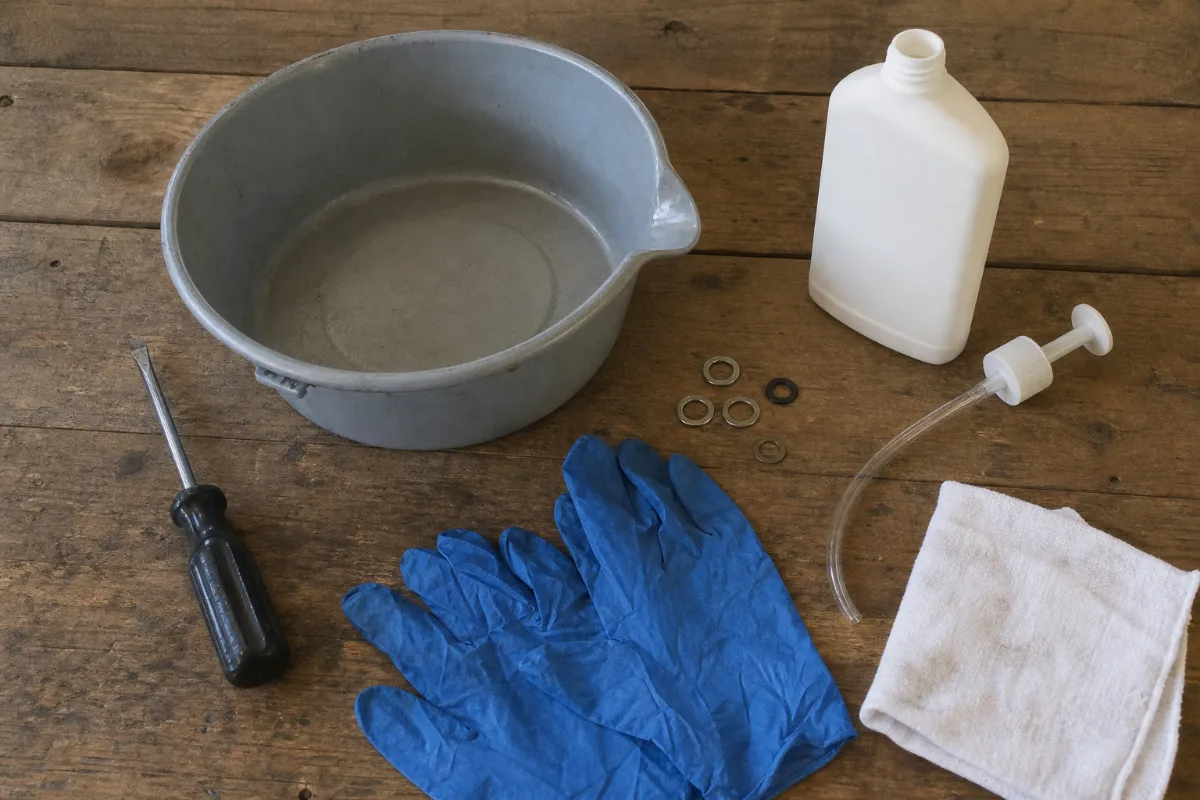
The kit for this is small and cheap:
- A flathead screwdriver that fits the screw slots snugly, so you don’t chew them up
- A clean drain pan, ideally a light-colored one so you can actually see the oil
- The marine gear lube your manual calls for, not whatever’s on the auto parts shelf
- A gear lube pump that threads onto the bottle
- New sealing washers for both screws
- Rags and a pair of nitrile gloves
How much lube you need depends a lot on the motor. A little kicker might take a few ounces, and a bigger motor can take around a quart. Your manual has the real number. Buy a bit more than it says, because some always ends up on the floor.
The one thing I wouldn’t skip is the pump. You can technically squeeze gear lube in from a bottle with a nozzle, but it’s slow and messy, and you’ll be tempted to quit before the case is actually full. A pump that threads onto a quart bottle turns the refill into a couple of minutes. The one below comes with 8mm and 10mm adapters, which covers the fittings on most of the motors I’ve dealt with.
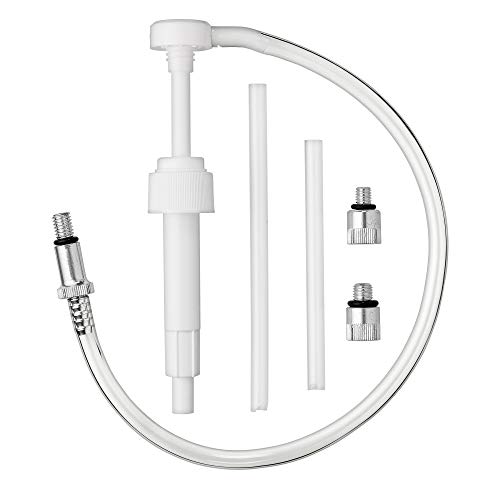
- 🚤 PUMPS 8CC PER PUMP STROKE (Includes Metal 3/8" Adapter Connected To Clear Plastic Tubing)
- 🚤 THIS GEAR OIL CHANGE KIT includes 3 adapter sizes. 3/8"(Swivel, Metal), 8mm and 10mm (Metal). Take the guess work out of figuring out the size of your Lower Unit's gear oil drain plug. (WON'T FIT VOLVO PENTA)
- 🚤 2 Rigid Suction Tubes REACHES TO BOTTOM OF TALL AND SHORT GEAR OIL BOTTLES
$15.49 In Stock
Paid link · price checked October 16, 2026 09:18
Drain it the right way round
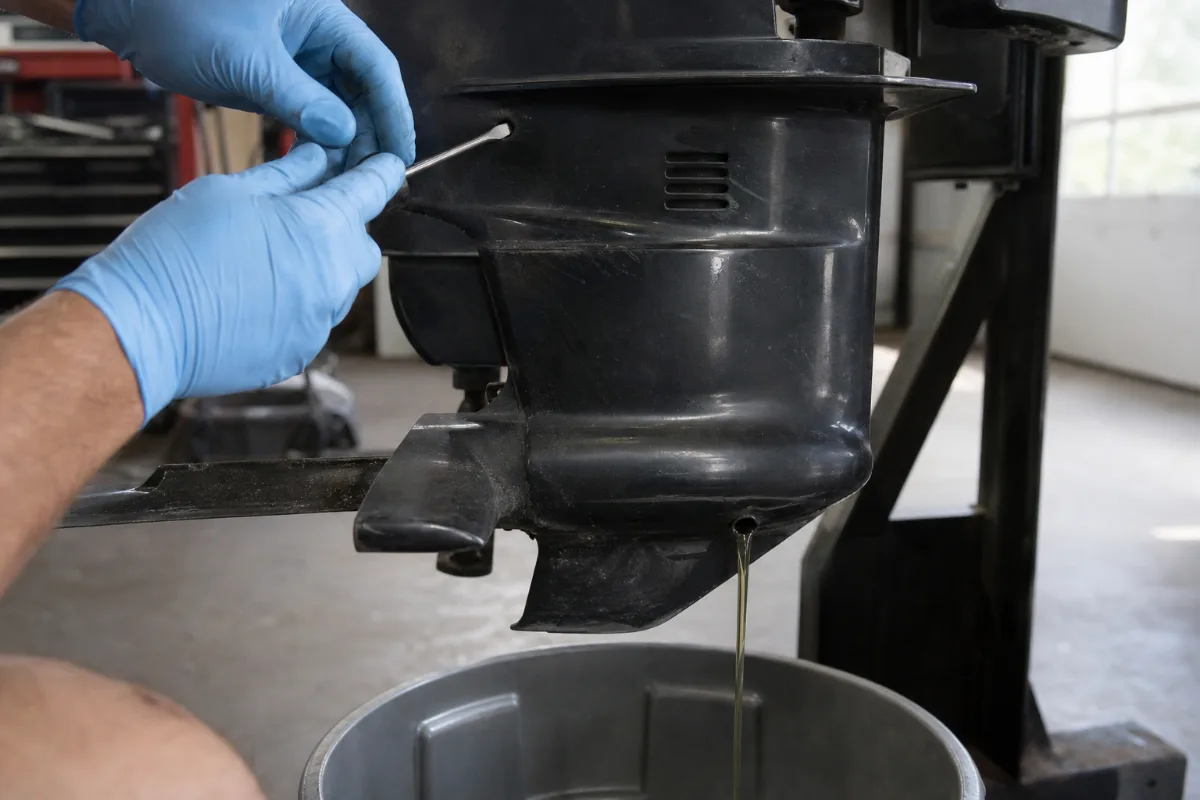
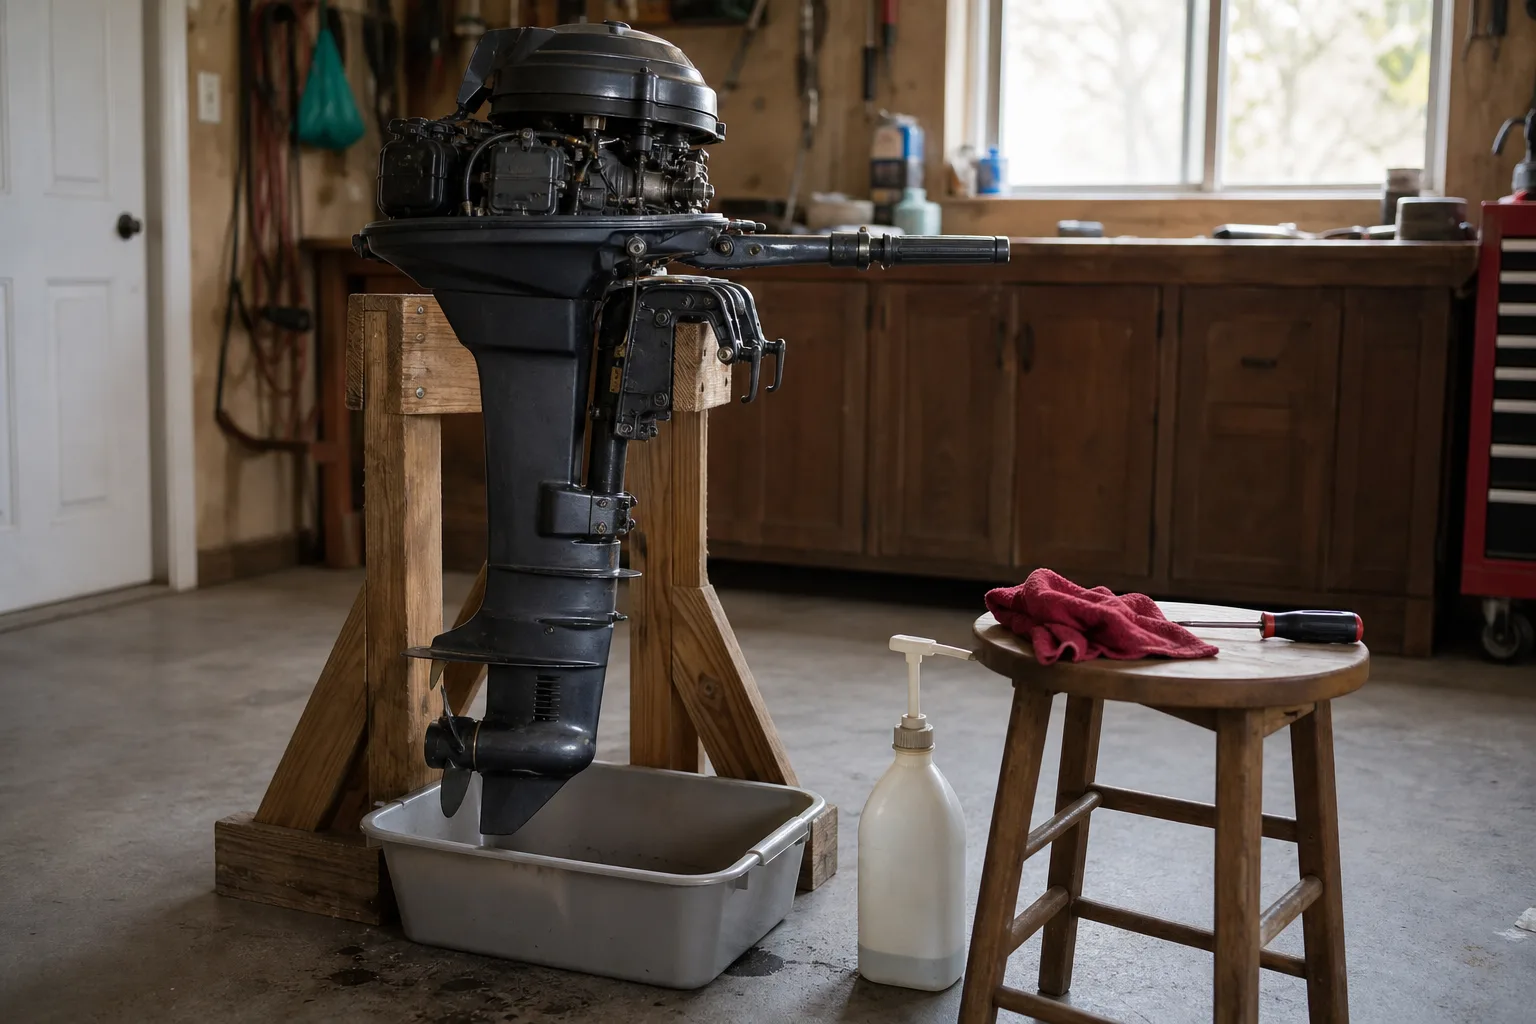
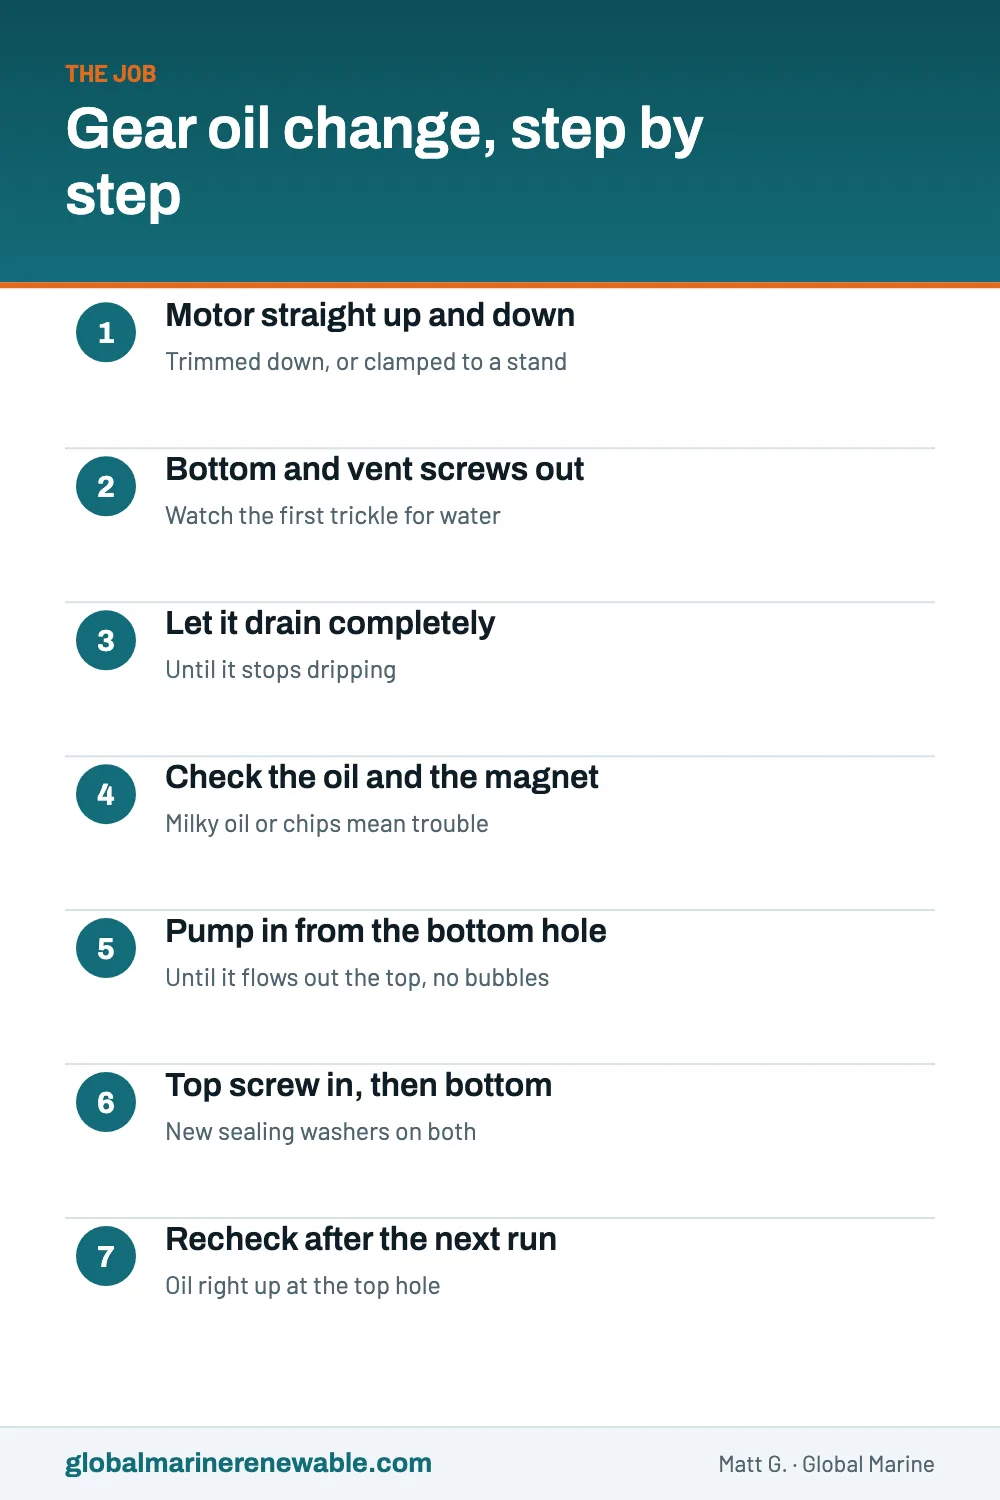
Start with the motor straight up and down. If it’s on the boat, trim it all the way down. If it’s a small portable, clamp it to a stand. Drain it tilted and some of the old oil stays trapped inside.
Set the pan under the lower unit, then take out both the bottom screw and the top vent screw. The oil only really flows once the vent is out and air can get in. I pull the bottom one first so I can watch the very first trickle, because free water is heavier than oil, and if there’s much of it in the case it comes out before the oil does.
Leave it until it stops dripping, and go grab a coffee while you wait.
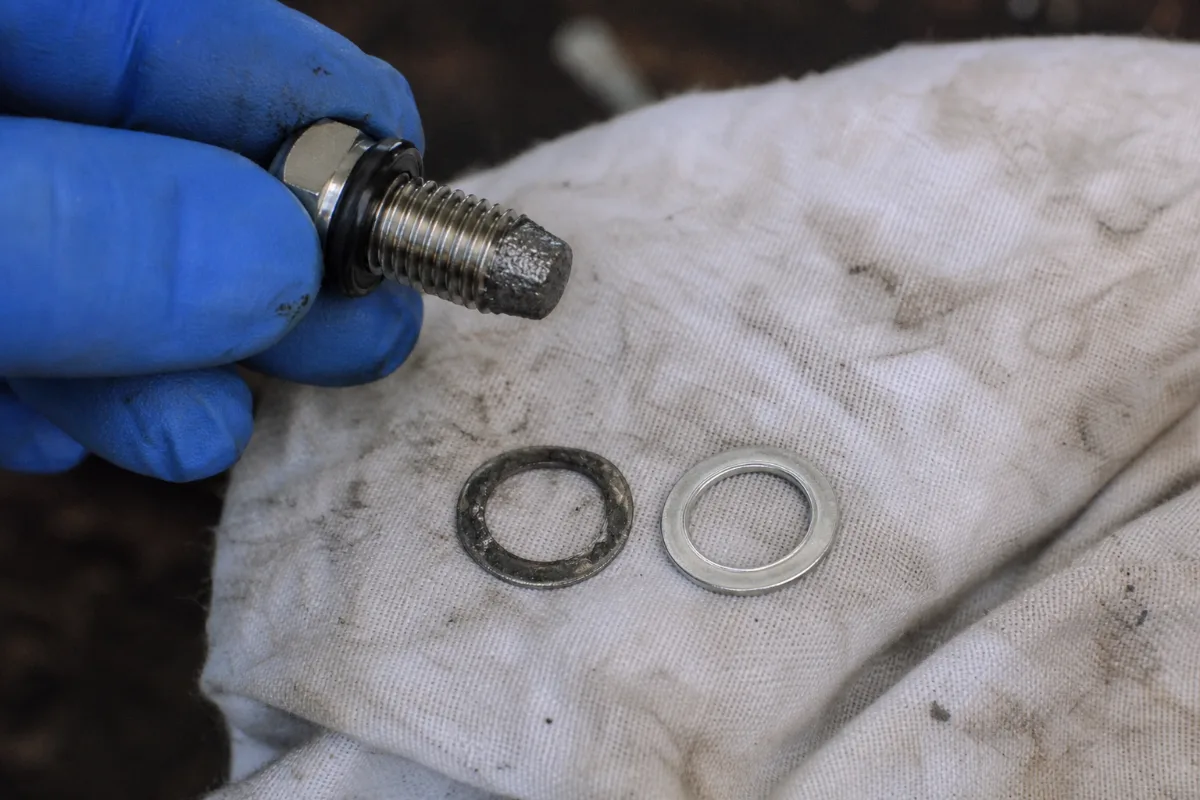
While it drains, look at both screws. Some drain screws have a small magnet on the tip to catch metal particles. If yours does, wipe it on a clean rag where you can see what came off. Then check the old sealing washers. If a sealing washer is flattened, cut or missing, that alone can let water in.
It’s also a good moment to pull the prop and look behind it for fishing line. The motor’s already up, you’re already dirty, and line on the shaft can damage the seal back there.
Reading the old oil
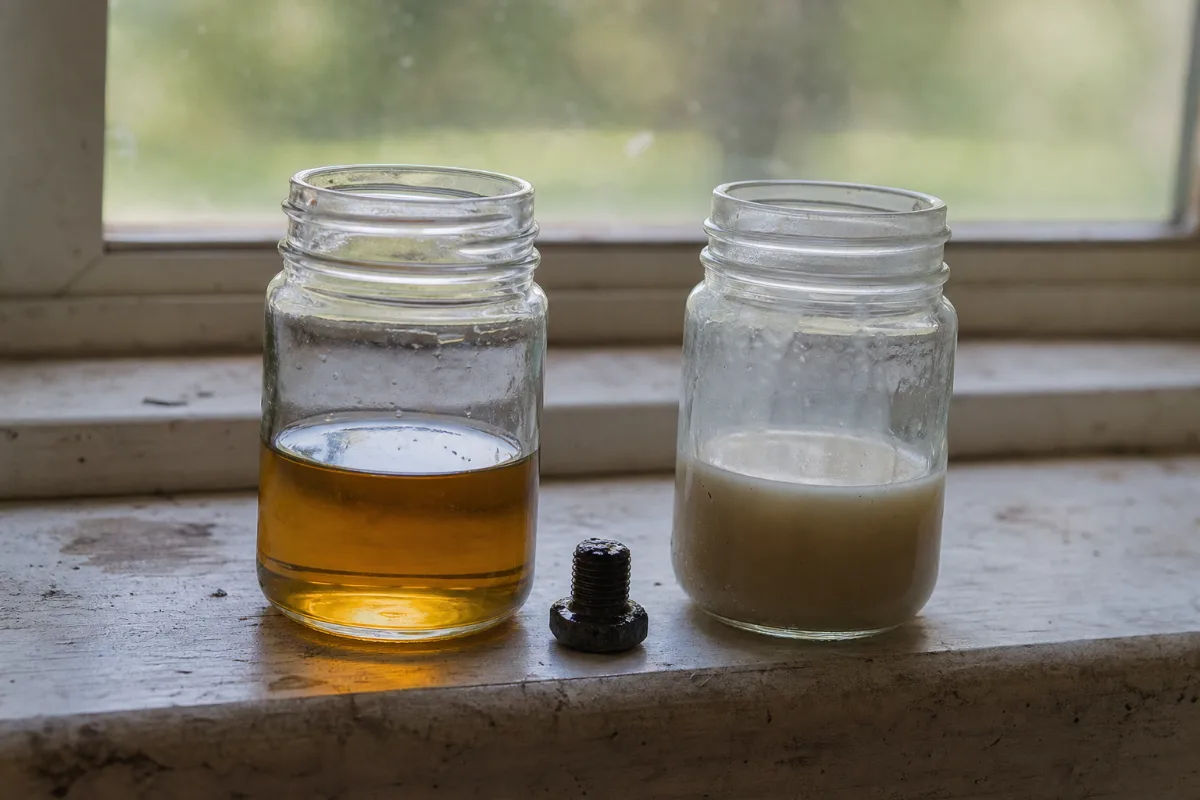
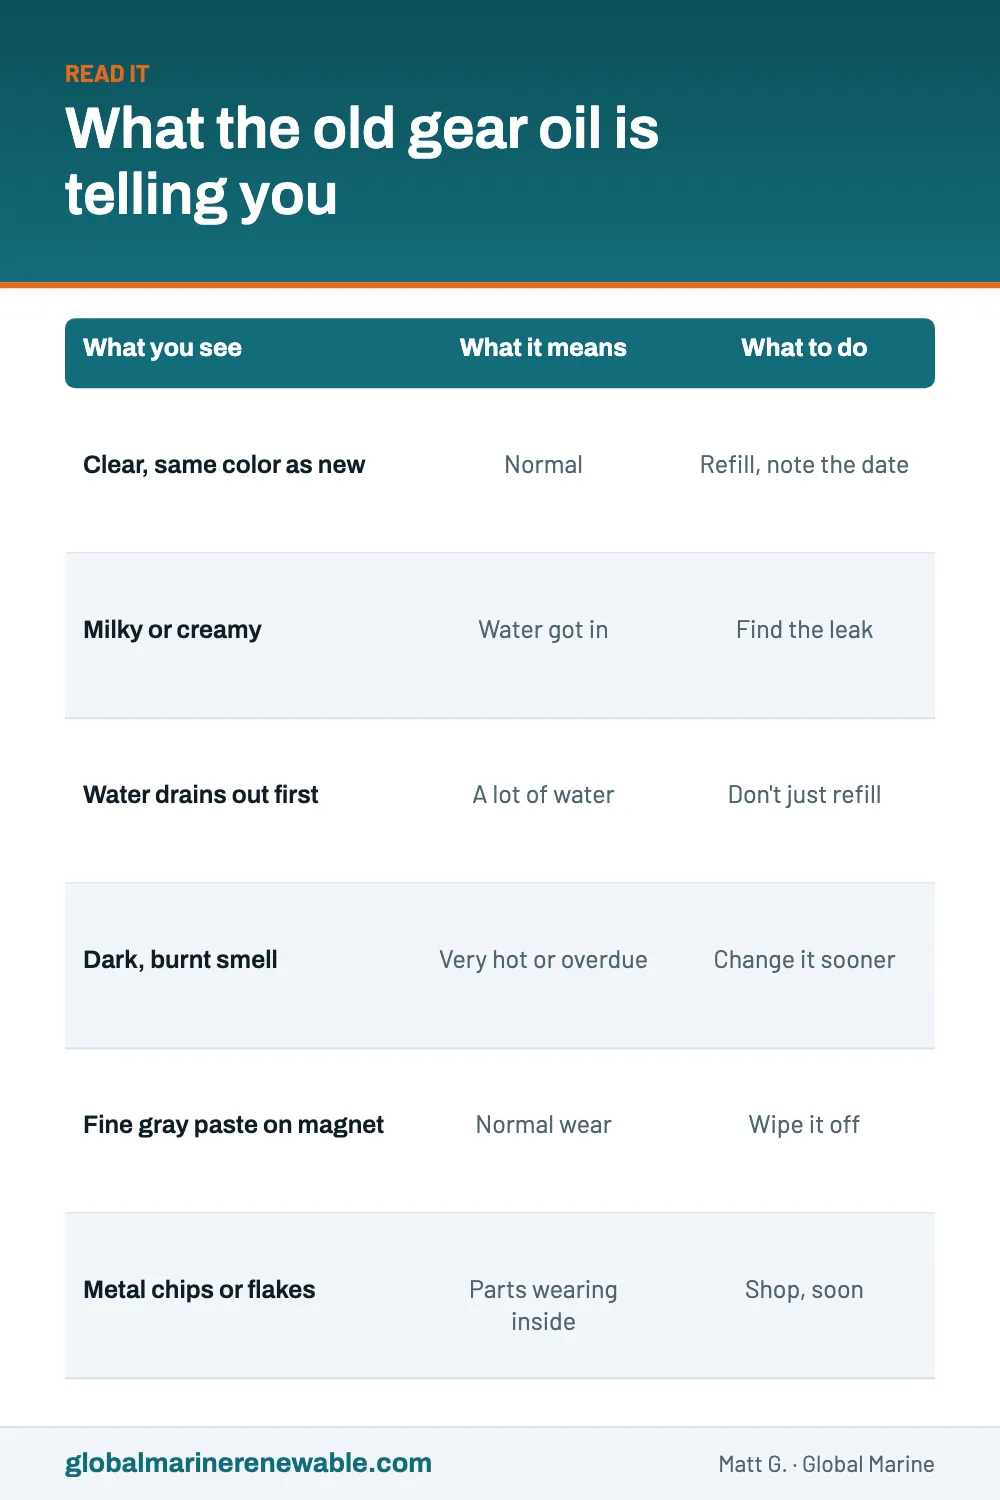
Here’s the part that actually earns the half hour. Tip a little of the old oil into a clear jar or a plastic cup and hold it up to the light.
- Clear, and about the color it went in: good news. Refill and move on. Gear lube comes in different colors by brand, so compare it to the new stuff, not a picture online.
- Milky, creamy or grayish-tan: water has mixed into it. A seal, or a drain screw washer, is leaking.
- Water running out before the oil: a lot of water got in. Don’t just refill it and hope.
- Dark, with a burnt smell: the oil got very hot, or it’s well past due.
Then check the magnet. A thin, fine gray paste on the tip is normal wear on a lot of motors, and I just wipe it off. Actual chips, flakes or slivers of metal are a different story. Those usually mean something inside is wearing, and I’d want a shop to look at it before putting many more hours on the motor.
If the oil looks good, great, write the date down somewhere. If it doesn’t, don’t panic either. Milky oil caught in the fall is usually a seal job. Milky oil left in there all winter can become a housing job.
Refill from the bottom, not the top
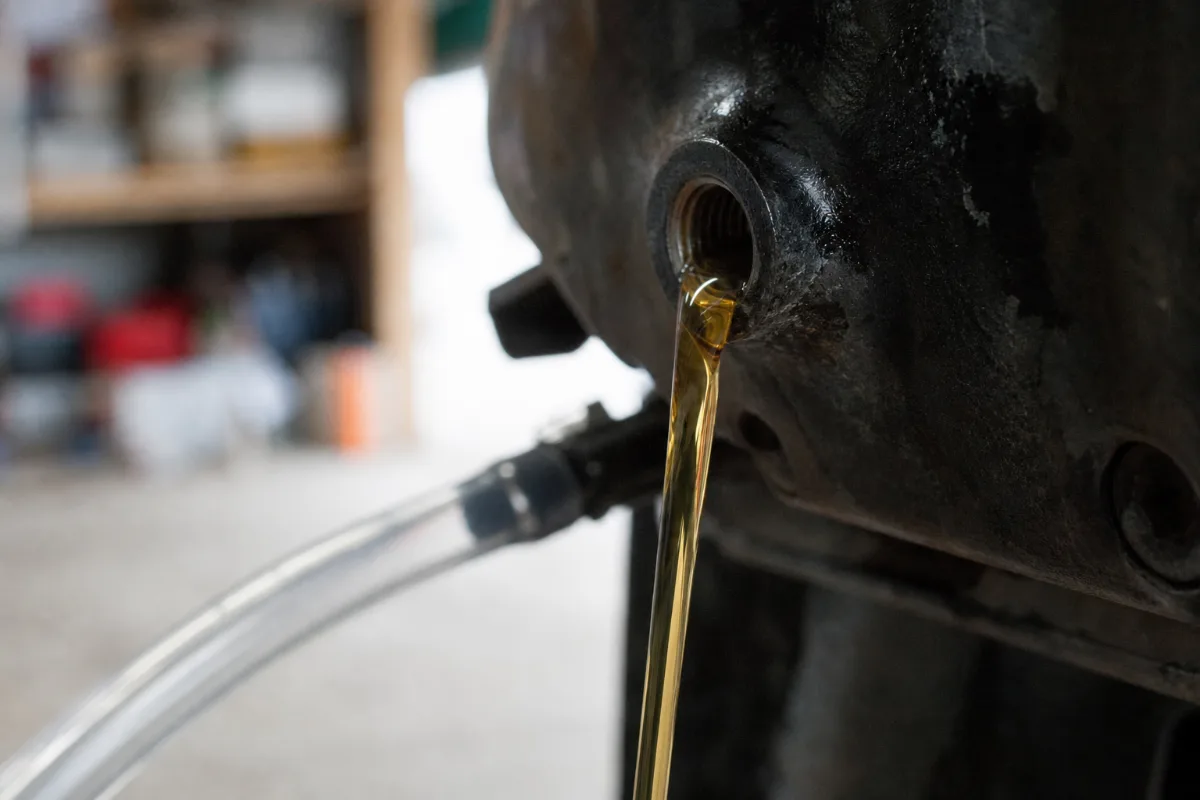
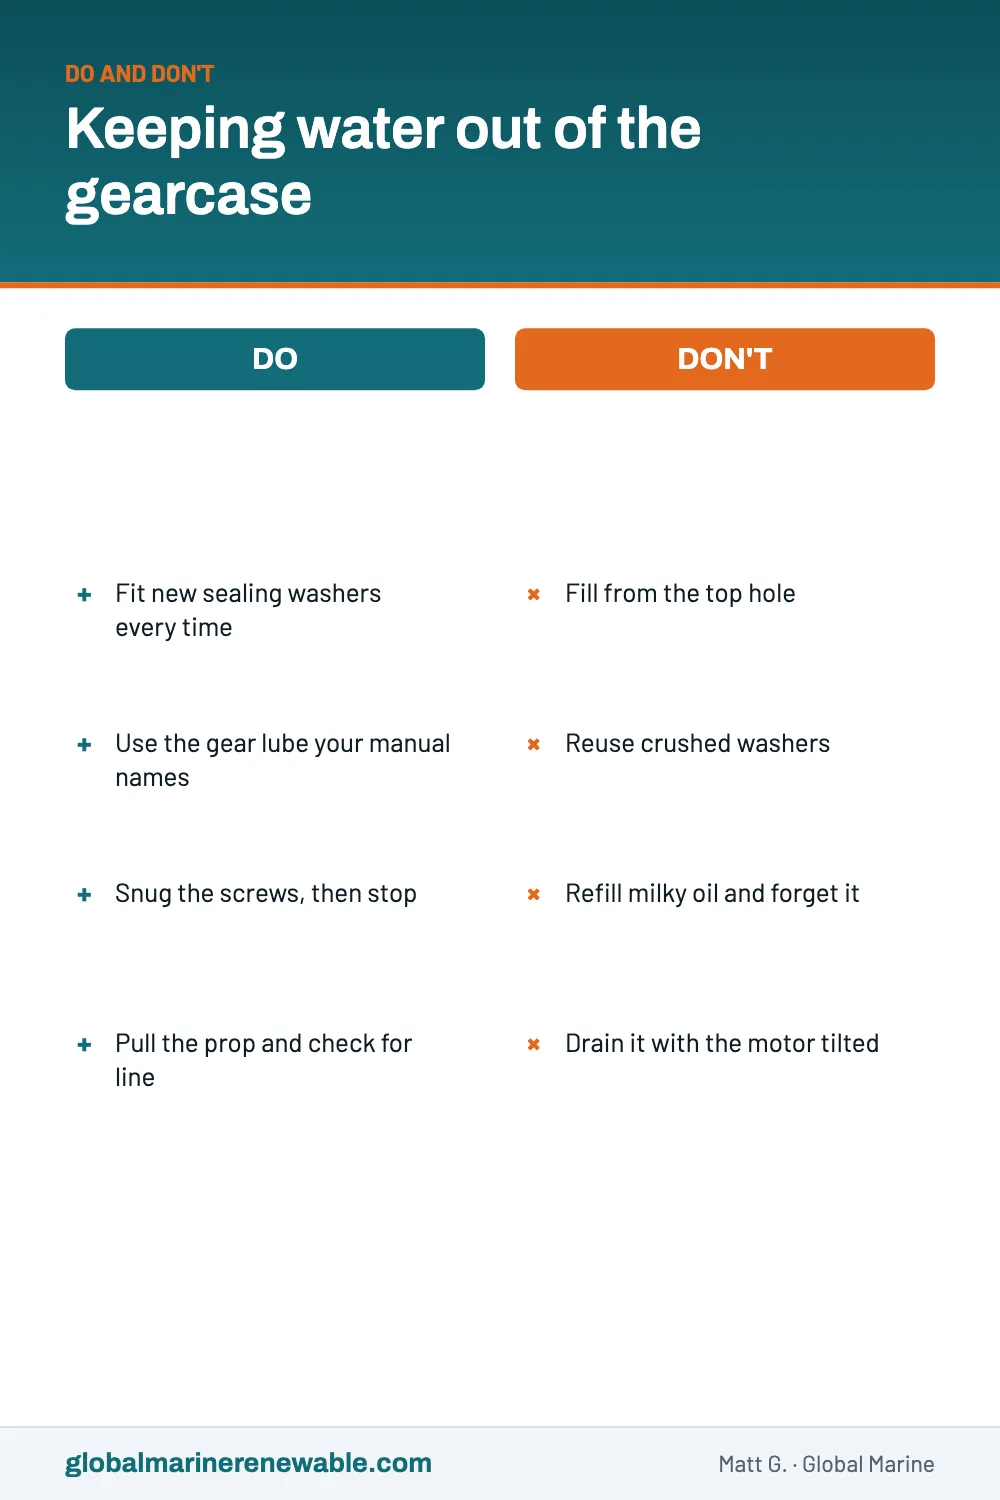
This is the step people get backward, and I get why. Pouring into the top hole feels natural. But filling from the top traps air inside the case, and you can end up with a gearcase that looks full at the vent hole while it’s actually short on oil.
So thread the pump onto the bottle, screw the pump’s fitting into the bottom hole, and start pumping. Keep going until oil comes out of the top vent hole in a steady stream with no air bubbles in it. Then:
- Put the top vent screw back in, with a new sealing washer, while the pump is still attached.
- Unscrew the pump from the bottom hole. With the top screw in, the oil comes out slowly instead of pouring, so you’ve got a few seconds.
- Quickly put the bottom screw in with its new washer.
Snug both screws, but don’t lean on them. The gearcase is aluminum, and stripped threads turn a half-hour job into a shop visit. If your manual lists a torque value for those screws, it’s worth using.
After the next time out on the water, or a few minutes on the muffs, I pull the top screw with the motor upright and make sure the oil is still right up at the hole. It’s a quick check that the case stayed full.
Mistakes that let water back in
I’ve made at least half of these myself, so no judgment here.
Reusing the old washers. They seal by pressing tight between the screw head and the housing, and once they’ve taken that shape they don’t seal as well a second time. New ones cost a couple bucks.
Grabbing the wrong lube. Your manual names the gear lube spec your motor needs, so use one that meets it rather than whatever is on sale.
Overtightening. Already covered, but it’s worth saying twice. Aluminum threads don’t forgive.
Ignoring what drained out. Fresh oil over a leaking seal will look fine at first, and the leak is still there.
Skipping the prop. Fishing line wrapped around the prop shaft can cut into that rear seal and let water in. Pull the prop once a season and look. While you’re down there, check the anode on the lower unit too.
When milky oil means a shop visit
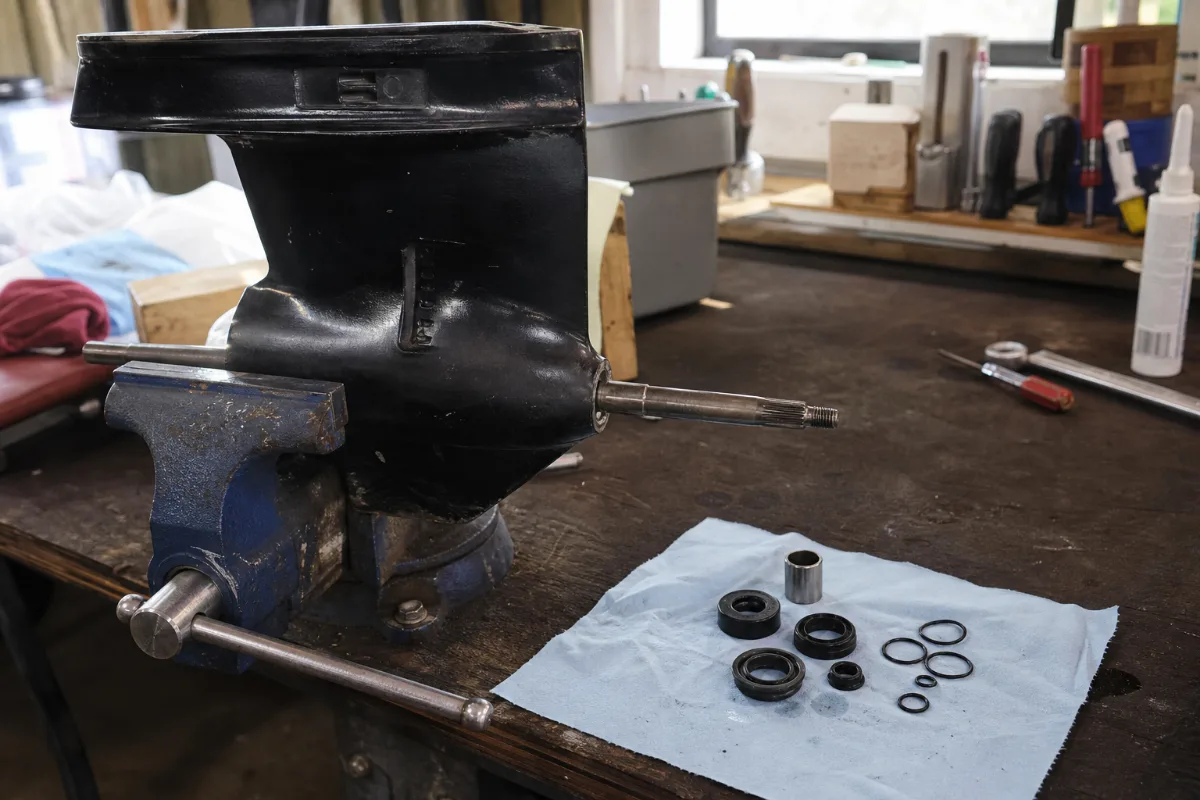
If the oil came out milky, the next question is which seal is leaking, and that’s where I stop doing it myself. A shop can pressure and vacuum test the gearcase, which finds the leak instead of guessing at it. Replacing seals and then testing the case properly takes tools I don’t own and don’t need often enough to buy.
In the meantime, here’s what I’d do. If it’s the end of the season, change the oil so there’s no water sitting in there over the winter, and get it looked at before spring. If you’re mid-season and want to keep using the motor, change the oil, run it a couple of times, and check again. If the water comes back fast, park it until it’s fixed.
Sometimes it’s good news, though. A cut drain screw washer can let in enough water to turn the oil milky, and that’s a two-dollar fix. So replace the washers first and recheck before you assume the worst.
If I had to keep one habit out of all this, it’d be pouring a little of the old oil into a clear cup every single time. It takes five seconds, and along with the magnet, it’s the part of the job that tells you the most.